Because knits stretch easily, the key is to stabilise gently without pulling the fabric out of shape with an embroidery hoop.
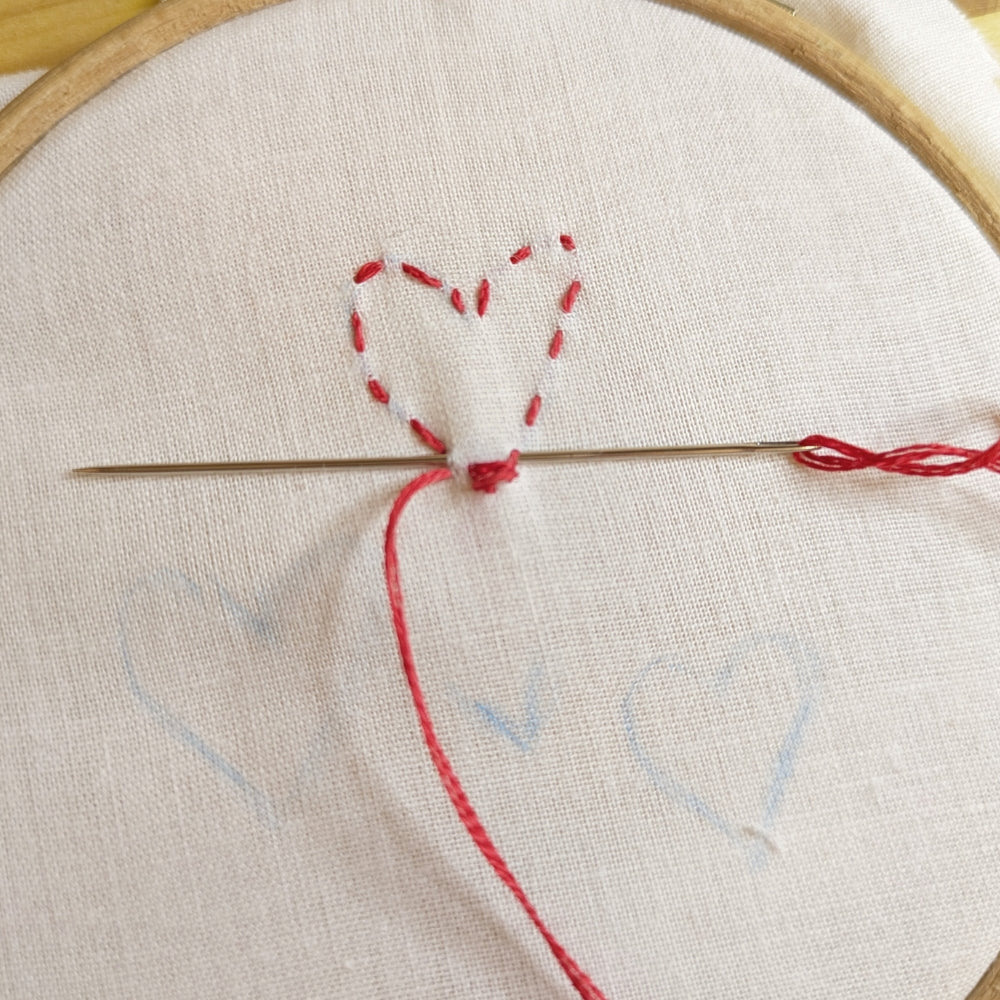
Before stitching, lightly sketch your design using a washable or heat‑erasable fabric pen. This gives you clean lines to follow and keeps your design centred.
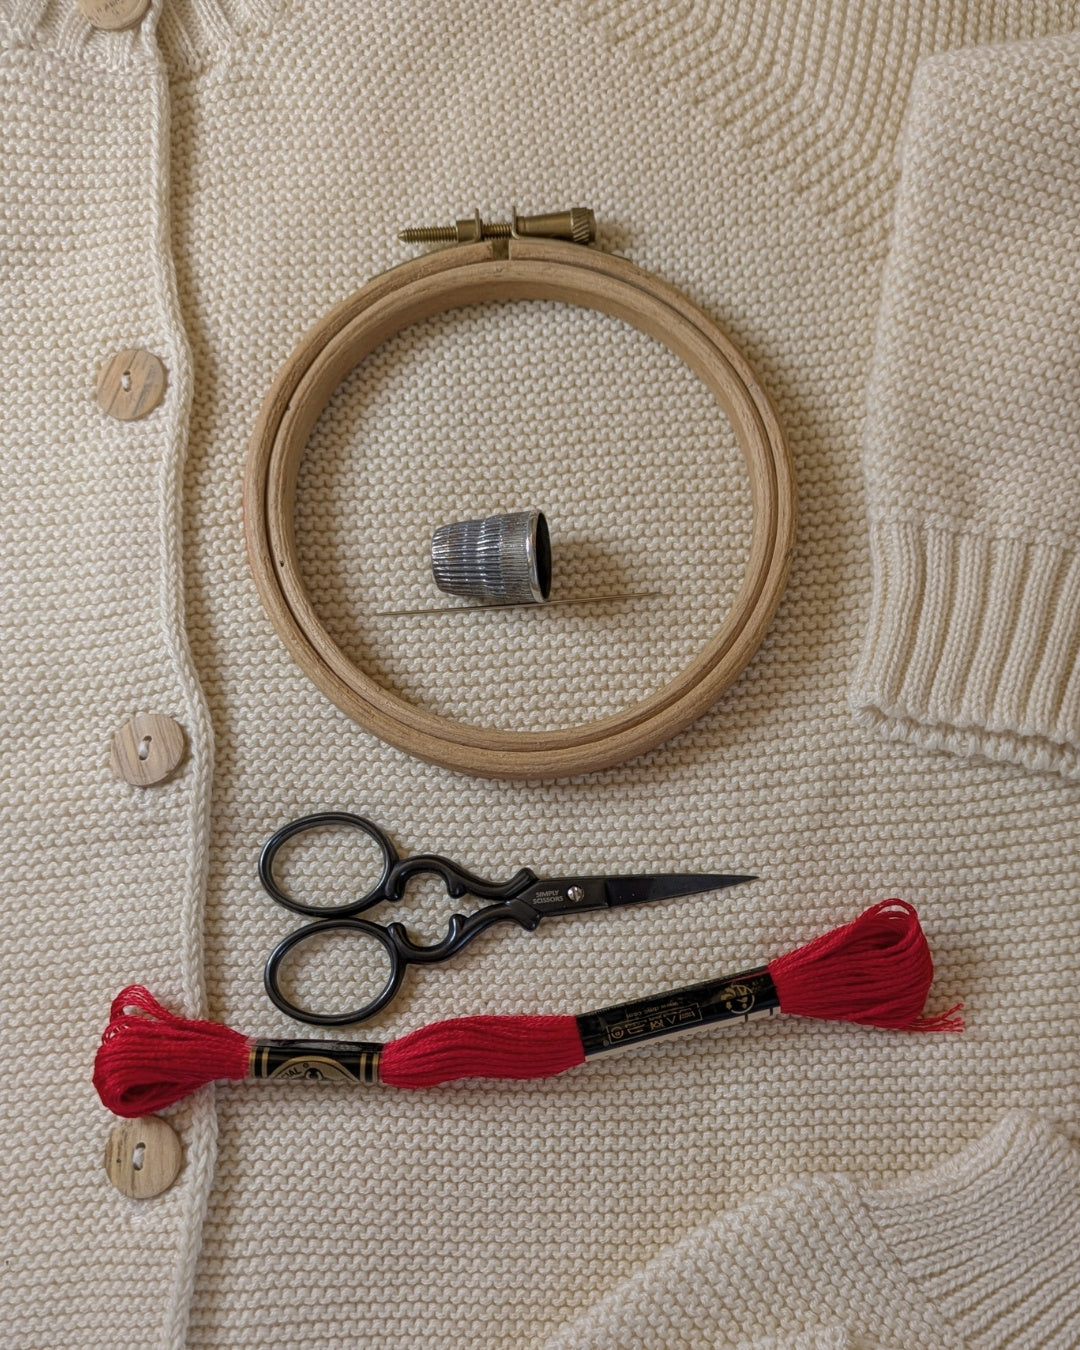
When you place your fabric in a hoop, keep the tension firm but not tight just enough to hold the fabric steady without stretching the knit structure. This guide uses DMC Thread No 321 a smooth and versatile stranded cotton that works beautifully for small Valentine details.
Starter Kit List
You will need:
- DMC Thread No.321 in red, alternatively, DMC 666 for a classic Valentine red).
- 4 inch embroidery hoop (perfect for small motifs).
- Washable or heat‑erasable fabric pen.
- Embroidery needle (size 7–9).
- Small scissors.
- Thimble (optional.
Best for: Solid heart shape.
1. Draw your shape and place the fabric in the hoop with soft, even tension.
2. Outline the shape with a running stitch, keeping stitches short and neat.
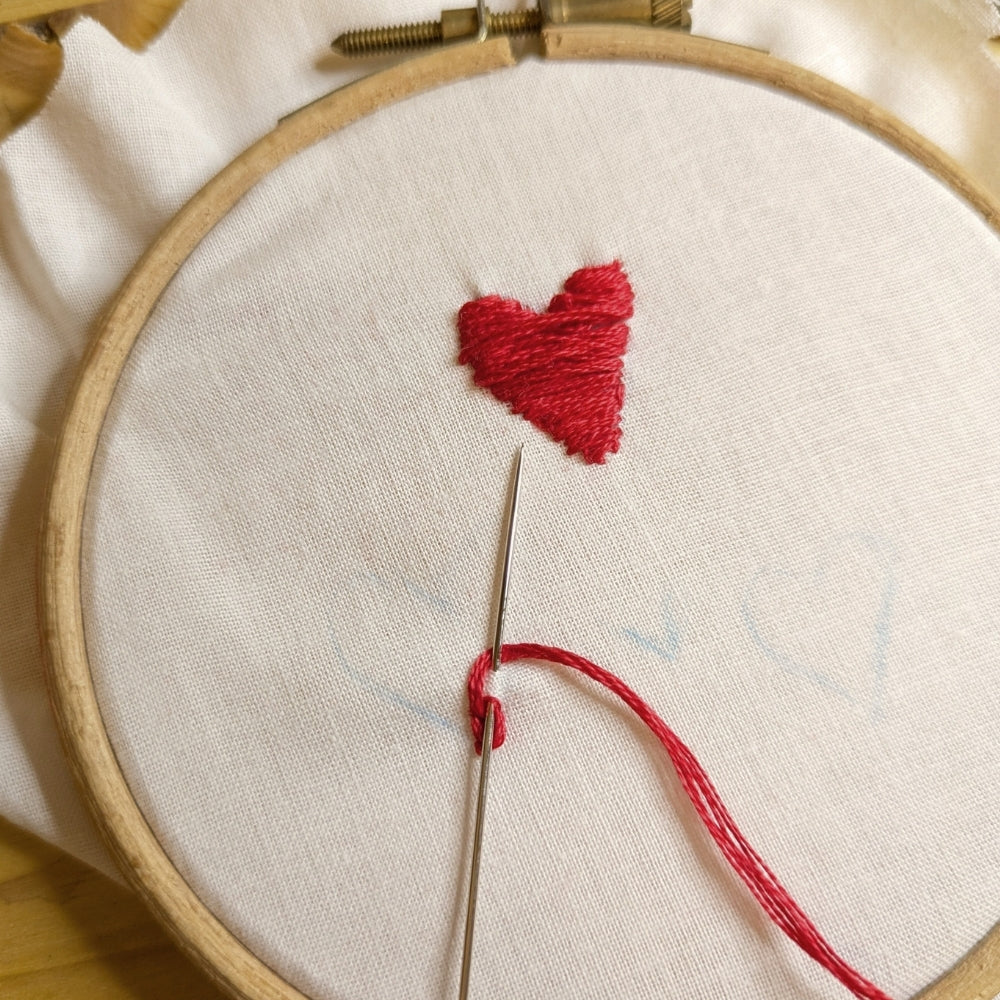
3. Switch to a horizontal satin stitch. Knot the thread and bring the thread to the front of the fabric following the template create horizontal stitches filling the heart shape.
4. Work from the point of the heart towards the top.
5. You can either bring the thread up next to the thread you took to the back, alternatively you can form a continuous left to right motion which forms the same shape on the back of the fabric and uses twice the amount of thread.
Pack your satin stitches closely to create a smooth, solid fill.
Complete one side of the heart curves, then move to the next for a clean finish.
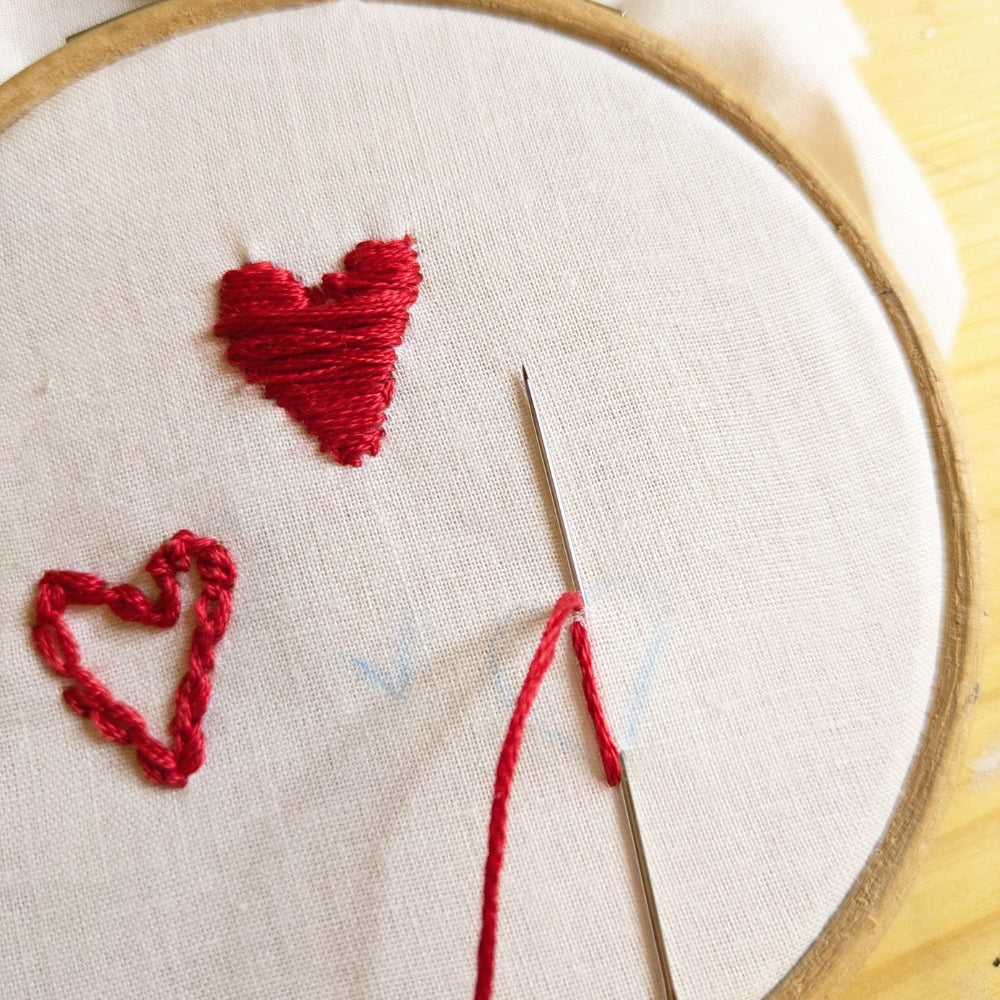
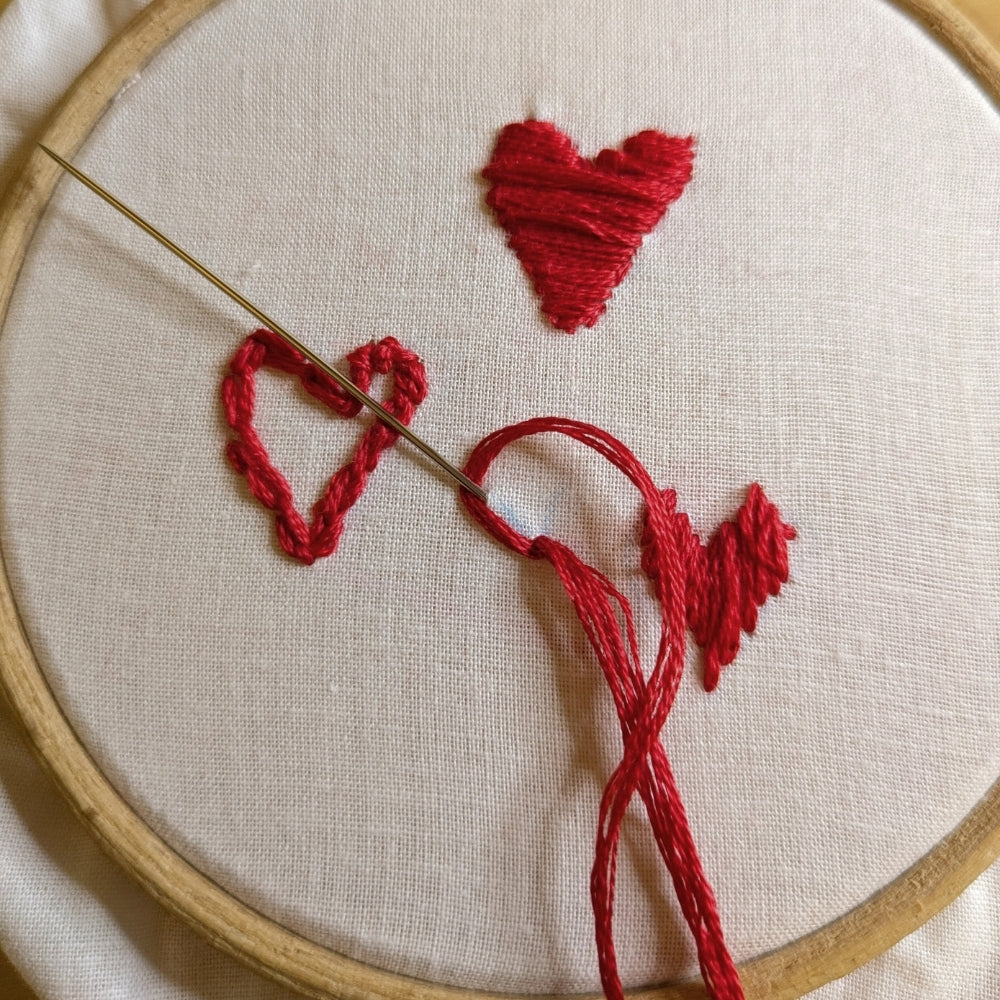
Best for: An open-heart shape embroidered motif
1. Lightly sketch your outline and secure the fabric in the hoop without overstretching it.
2. Bring your needle up, form a small loop and pull the needle back through the fabric. Before you pull the loop tight bring the needle up through to the right side whist catching the loop just created. As you catch the pervious loop make the next loop and repeat the process. The loop you make will vary depending on the size of the motif.
3. Continue linking each new loop into the previous one. Don’t pull too tightly.
4. Follow the shape until the full outline is complete.
Best for: Tall hearts with vertical fills.
1. Draw your shape and place the area in a softly tensioned hoop.
2. Bring the needle up on one edge of the shape and down directly opposite, creating a long vertical stitch. Work steadily across, keeping stitches parallel.
3. Lay each new stitch close to the last to create a clean, even fill.
Best for: Small delicate heart‑petal shapes.
1. Draw your petals or loop shapes and gently hoop the fabric.
2. Make a lazy daisy stitch by bringing the needle up, looping the thread, and tacking the loop down.
3. Repeat to create the two sides of a heart.
4. Add tiny straight stitches inside each loop to give extra texture and fullness.
Use DMC 25 three‑stranded on knits and two or one strand for fine details.
Keep your hoop not too tight on knits to avoid distortion.
Always test your fabric pen on a scrap of fabric first to ensure it erases cleanly.